In honor of finishing the OBS portion of the expedition, I will talk about how we go about recovering the OBS instruments. This has been my favorite as well as the most stressful aspect of the OBS process. Even though there were some issues, we were able to recover all of the OBS we deployed!!!
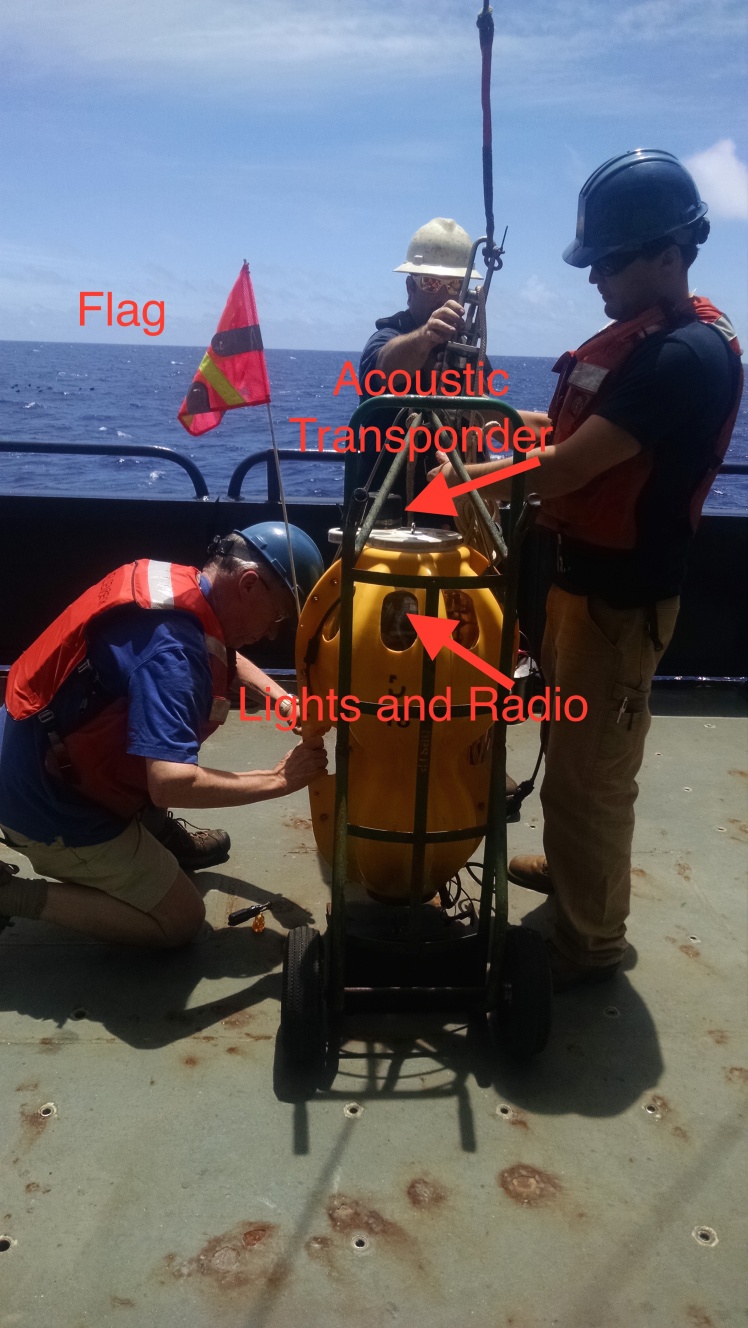
I mentioned in my last post that the last step of the deployment process is to check if the OBS is still sinking and then send a signal to turn off the acoustic transponder on the OBS. So the first step when we reach the OBS drop site is to send an enable signal through the transducer to the OBS to turn the transponder back on to receive signals. When we receive a signal from OBS saying it was enabled, then we send a burn signal. This signal is very important because when the OBS receives this signal, it will send a current through a small wire that is holding the OBS and the metal plate. When a voltage goes through this wire, it will start to burn and when it is burned off (~15 min), the latch holding the metal weight and the OBS together is released, allowing the OBS to float to the surface. Depending on the depth of the sea floor (ranging from 3500 meters to 5000 meters), the OBS takes anywhere from 45 – 75 minutes to surface.
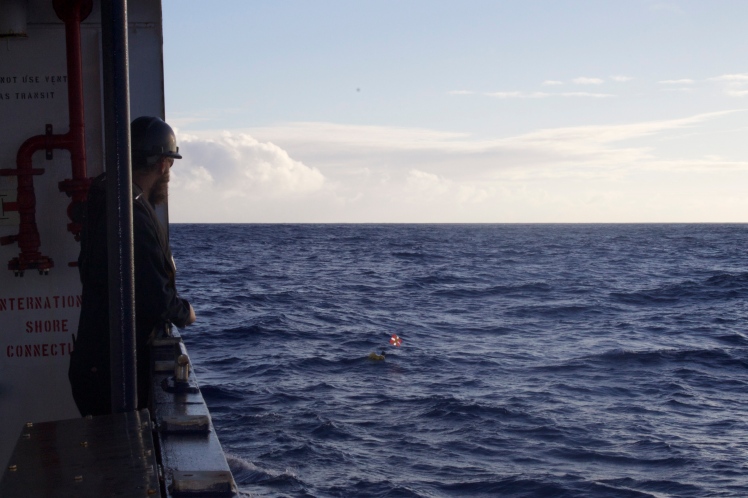
When it is on the surface, there are three ways for us to figure out where it is: the flag, signal from the radio on the OBS, and flashing lights. The flag is more useful during daytime and the lights during the nighttime. Five to ten minutes before the OBS is to resurface, Peter, Dan, one watchstander, Gail or Bobby and a couple of science technicians will be on deck trying to scan the ocean for the OBS. The bridge is also helping with locating the OBS on the surface by scanning the frequency of the radio on the OBS. When the water was relatively calm, we usually found the OBS before the bridge did. But when the waves were large, it was very difficult to visually spot the OBS until it is vey near the boat.
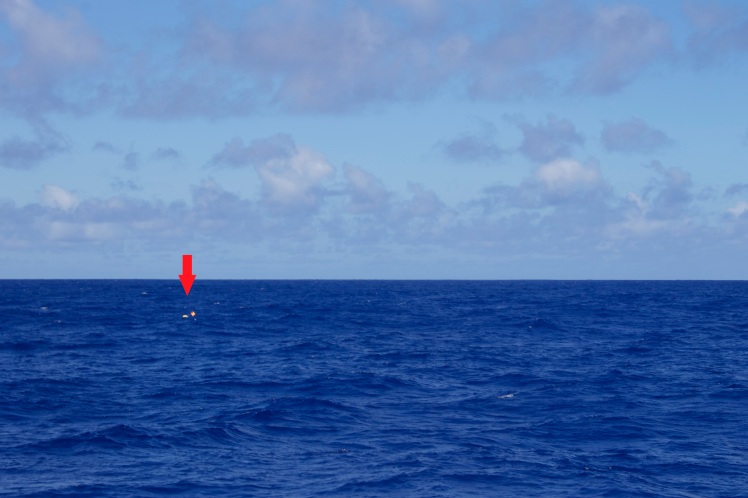
When the bridge navigates the boat next to the OBS, Peter and Dan will try to hook the OBS by using long poles that have hooks. This is a difficult task when the ship is bobbing up and down as well as the OBS going along with the waves. When the hooks are on the OBS, it is then lifted by the crane and put on the deck. Then we wash it off with fresh water and the job is done!! The total time it takes from recovery of one OBS to the recovery of the second OBS takes approximately 2 – 2.5 hours. On this trip, we have successfully deployed and recovered 35 OBS instruments!!
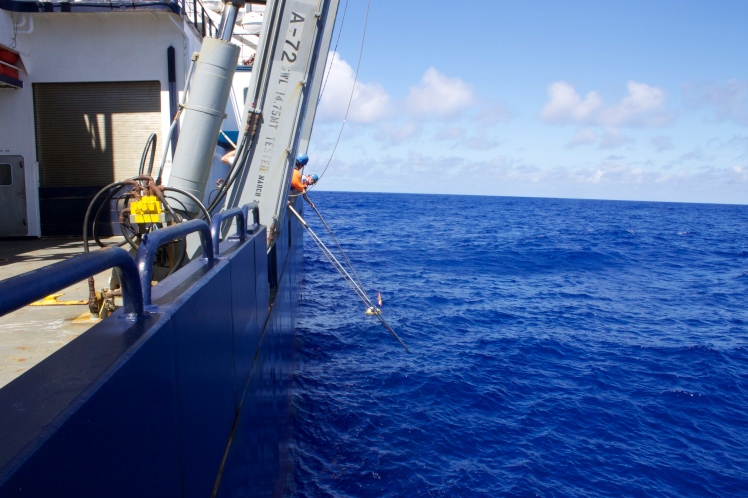
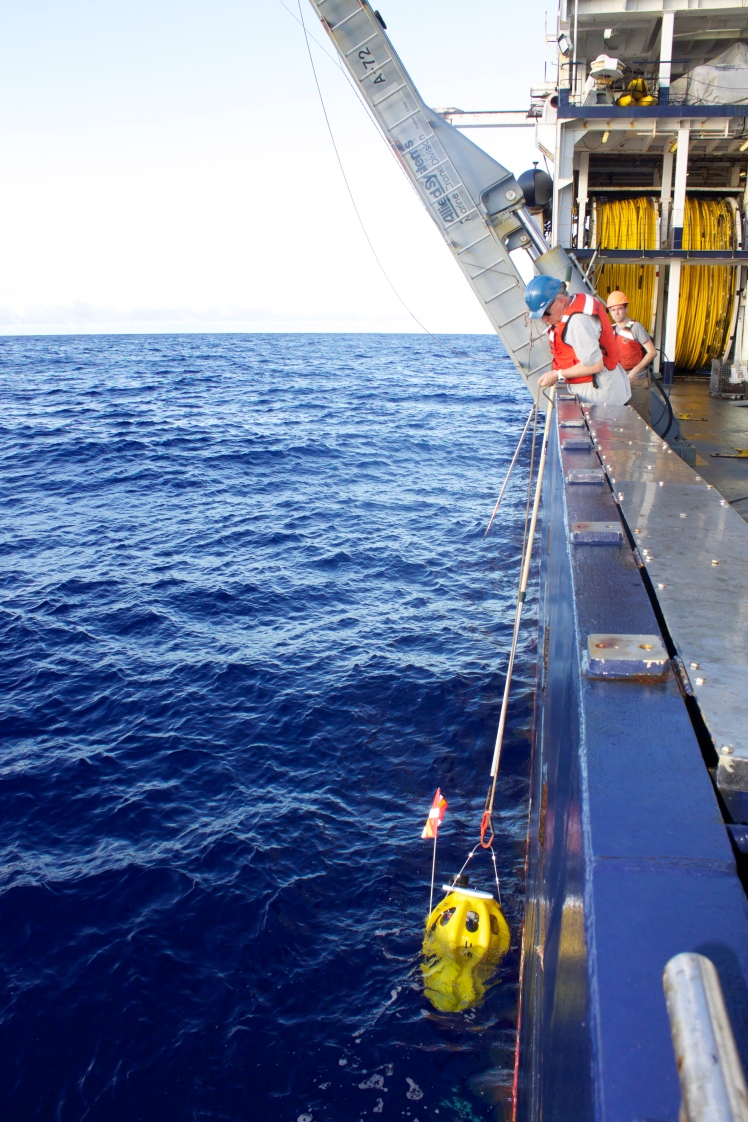
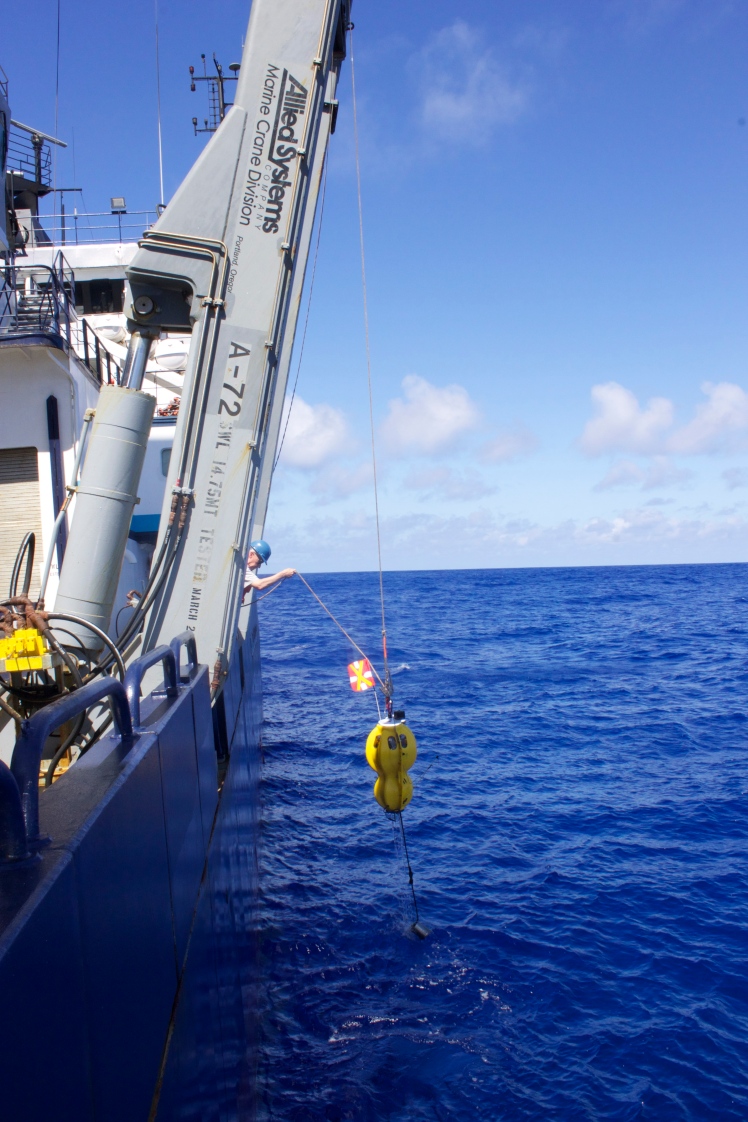
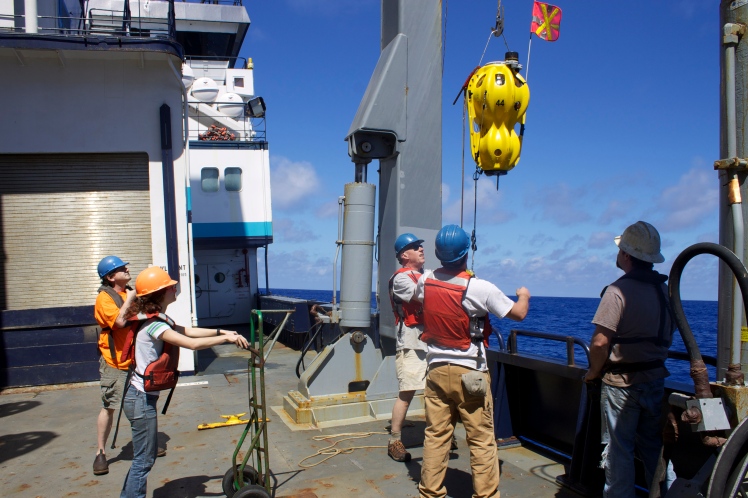
Photo credit goes to Stacey for taking these awesome pictures!!
Akhil Amara

Wow! 35 deployed…. and 35 recovered!!!! Good job everyone!
LikeLike
Congratulations on total recovery of all equipment! Sail on!
LikeLike
Glad to hear all the OBS were dropped and and are now safely aboard. Great job!
LikeLike
What is the average weight of an OBS instrument? The pictures Stacey took are awesome!!
LikeLike
The OBS weighs approximately 150lbs while the metal plate weighs about 50lbs. -Akhil
LikeLike